Production basics
Why Your Garment Is Failing at the Seam, Not the Fabric
Garment seam construction quality specifications determine whether your product survives retail. Here's what brands get wrong and how to fix it before the run.
Most garment failures come back to the same place: the seam. Not the fabric, not the print, not the trim. The seam. And yet garment seam construction quality specifications are almost never the first thing a brand founder asks about when they're placing an order. They'll spend weeks on colourways and label placement, and then hand over a tech pack that says 'stitch as appropriate' for every seam type on the spec sheet. The factory fills in the blanks. Sometimes they get it right. Sometimes you get 15 returns in your first month and no idea why.
Why seam construction gets ignored until the returns start coming in
The honest reason is that seams are invisible when they work. A buyer examining a sample sees the fabric hand, the colour, the print registration. They pull at the shoulder seam once, it holds, and they move on. Nobody is running 50 wash cycles on a pre-production sample and then checking seam integrity under tension before signing off on a purchase order.
The problem surfaces downstream. A retailer's customer wears the shirt three times, washes it twice, and the side seam starts splitting. Or the activewear legging looks perfect in the fitting room and blows out at the inseam after two gym sessions. By then you're dealing with returns, replacement units, and a retail buyer who's questioning whether to reorder. The cost of that failure is always higher than the cost of specifying the seam correctly in the first place.
In a production run of 500 units, a seam defect rate of just 3 percent means 15 garments that need to be reworked or rejected before shipment. Rework on a sewn seam typically costs 2 to 4 times the original sewing cost per unit, because you're often unpicking, re-cutting, and re-sewing. That's not a quality problem. That's a specification problem.
The three seam types most brands under-specify and what each one is actually for
There are dozens of seam types in the ASTM and ISO classification systems, but three come up constantly in the garments we produce here, and all three get mis-specified regularly.
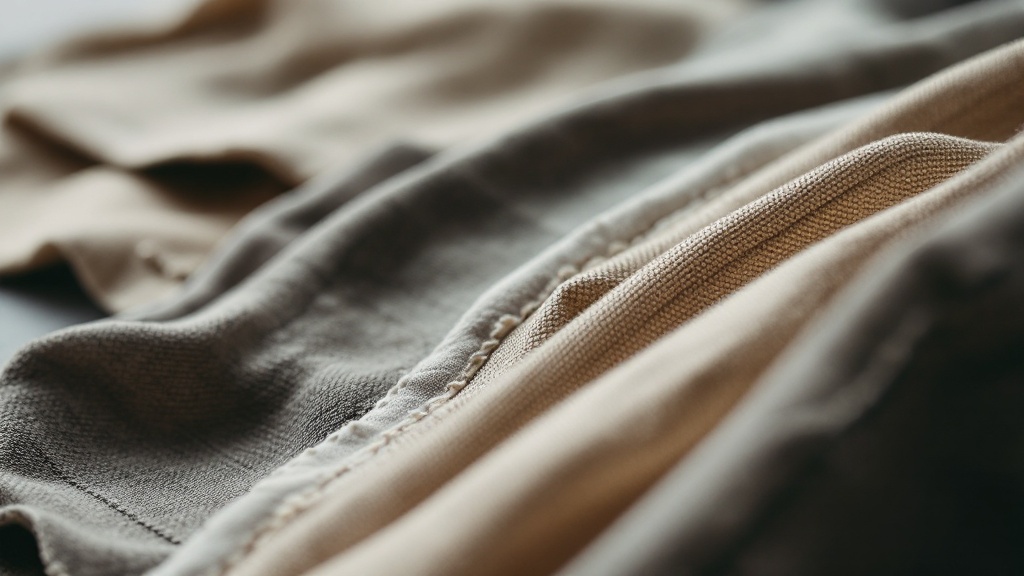
Plain seam (SSa)
This is the standard seam for most woven garments. Two pieces of fabric, right sides together, sewn along the edge. Simple, efficient, entirely appropriate for shirts, trousers, jackets, and most woven tops. The problem is that brands use it by default on garments where it isn't the right call, particularly on knit fabrics and anything that sees lateral stretch. A plain seam on a stretch garment restricts movement, and once the seam thread hits its limit, it breaks.
Flatlock seam (LSc)
A flatlock seam joins two fabric edges by overlapping them and sewing through both, so the finished seam lies flat against the body with no raised ridge. It distributes stress across a wider surface area than a plain seam, which is exactly why it's the correct call for activewear and swimwear where lateral stretch loads are constant. The seam moves with the fabric. If you're building performance leggings, sports bras, or anything in a 4-way stretch fabric and you're not specifying flatlock at the inseam and crotch, you're going to have failures.
Bound seam (BSa)
A bound seam wraps the raw edge in a separate strip of fabric or binding tape. It's what you see inside quality outerwear, tailored jackets, and any garment where the inside finish matters as much as the outside. It's also the right call for heavy or fraying fabrics where a serged edge won't stay clean through repeated wear and cleaning. It's slower and more expensive to produce. If your brand is selling at a price point where the inside of the jacket matters, it's not optional.
What stitch density numbers mean in practice and why 8 stitches per inch is not the same as 12
Stitch density is the number of stitches sewn per inch of seam. Standard for woven apparel runs 10 to 12 stitches per inch. That range gives you the seam strength you need without creating so much perforation in the fabric that you weaken the material along the seam line. Drop below that, and you're giving up strength. Dropping to 8 stitches per inch reduces seam strength by roughly 20 to 25 percent under tension testing. That's not a marginal difference.
Why would a factory run at 8 stitches per inch? Speed. Fewer stitches per inch means the machine moves faster and a seam takes less time to sew. On a large run, that translates to meaningful time savings on the production floor. It also means a garment that looks fine at delivery and starts failing at the seam after a few months in the field. If your tech pack doesn't specify stitch density, the factory will typically run at whatever their standard setting is, which may or may not match what your garment needs.
For knit fabrics, the calculus is slightly different. You need a stitch that stretches with the fabric, which is why overlock stitches are standard on knit seams. But density still matters. Too few stitches per inch on a knit overlock seam and you lose the structural integrity that holds the edge together through stretch cycles.
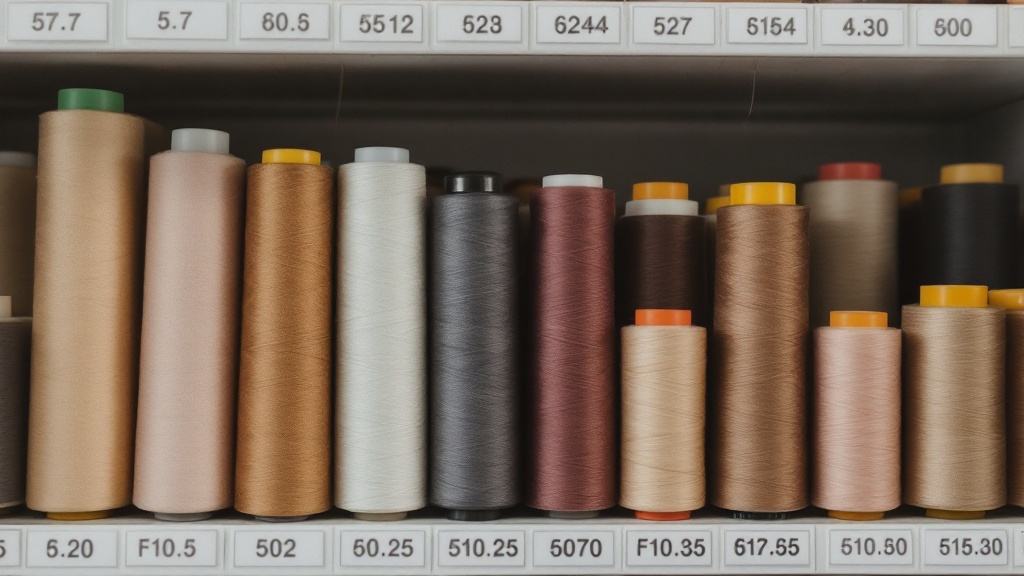
Thread weight, fibre content, and why the wrong thread fails before the fabric does
Thread ticket numbers run counterintuitively. A higher ticket number means a finer, lighter thread. Ticket 40 is heavier than Ticket 80. This trips up brand founders regularly, and it matters because using the wrong ticket number for your fabric weight is one of the most common causes of seam failure we see.
Using Ticket 80 thread on a heavy 12 oz/sq yd canvas or denim is a specification error that leads to seam breakage under normal wear. The thread simply isn't strong enough for the load the fabric imposes. For heavy wovens, denim, canvas, and outerwear, you want Ticket 40 or heavier. For lightweight wovens and standard knits, Ticket 60 to 80 is appropriate.
Fibre content matters even more than weight. Polyester core-spun thread has a breaking strength roughly 40 percent higher than all-cotton thread at the same ticket number. All-cotton thread has its place: it's appropriate for garments that will be mercerised, piece-dyed after sewing, or where the thread needs to match the shrinkage behaviour of a cotton fabric through repeated washing. But cotton thread in stress points on denim or outerwear is a common source of seam failure. The seam looks fine. The thread is correctly coloured and matched. And then it breaks, because the breaking strength was never adequate for the application.
How seam allowances interact with fabric weight and what happens when the spec is wrong
Seam allowance is the width of fabric between the cut edge and the stitch line. Most woven garments use 5/8 in as a standard seam allowance. But 'standard' is relative, and applying the same seam allowance across every fabric type in your line is a mistake.
On heavy fabrics like denim, canvas, or twill, a 5/8 in seam allowance creates bulk inside the seam. If those seams are pressed open, the result is a raised ridge on the face of the garment. You may need to grade the seam allowance down to 3/8 in and finish the edges separately to get a clean result. On lightweight fabrics, a 5/8 in seam allowance is fine and actually helps prevent the seam from pulling away from the fabric edge.
Knit fabrics are where seam allowance errors cause the most damage. A 3/8 in seam allowance on a high-stretch jersey that is not serged or overlocked will unravel within 10 to 15 wash cycles. The fabric recovers and places constant tension on the raw edge. Without an overlock stitch to secure the edge, the seam simply comes apart. We see this on garments that come in from brands who've had them produced elsewhere, usually produced with a locked seam where an overlock seam was required. The spec on paper looked fine. The result was not.
Where premium garments actually fail during wear and washing
The failure points cluster in predictable places. Side seams on shirts and jackets, because that's where torsional stress accumulates during normal movement. Inseams and crotch seams on trousers and leggings, because those seams take the full load of the wearer sitting, standing, and moving. Shoulder seams, because gravity and bag straps apply constant downward tension. And any topstitched seam where the decorative stitching was sewn with thread that wasn't appropriate for the tension it would encounter.
Stitch type matters here too. Stitch type 401, the chainstitch, is faster to produce than stitch type 301, the lockstitch. But a chainstitch will unravel from the end if the thread breaks, because the stitch structure is a chain: one break cascades through the entire seam. That makes it a poor choice for side seams on finished product. A lockstitch, where each stitch is an independent loop locked by a bobbin thread, contains a thread break to a single stitch. The seam doesn't run. For any seam that's going to see wear tension, lockstitch is the safer call.
Washing is a different kind of stress. Heat, agitation, and detergent attack the thread as much as they attack the fabric. This is where thread fibre content and dye fastness matter. Polyester thread resists detergent better than cotton. But if your thread wasn't adequately colourfast, you'll see thread fading before fabric fading, and on a dark garment that reads immediately as low quality even if the fabric itself is holding perfectly.
What to put in your tech pack to lock in seam quality before the cut
A tech pack that actually controls seam quality isn't a complicated document. It just needs to be specific about the right things. Here's what needs to be on it.
- Seam type by location: specify the seam type for every major seam on the garment, not 'as appropriate'. Side seam, shoulder seam, inseam, crotch seam, armhole, hem. Each one.
- Stitch type by location: 301 lockstitch, 401 chainstitch, 504 overlock. Match the stitch type to the seam function and fabric.
- Stitch density: state the stitches per inch required for each seam type. 10 to 12 SPI for woven seams, appropriate SPI for your knit overlock based on fabric weight.
- Thread specification: ticket number, fibre content, colour reference. Don't say 'match fabric'. Specify the thread.
- Seam allowance: by location and by fabric type. Not one measurement for the whole garment.
- Topstitch specification: if your garment has decorative topstitching, specify needle spacing. Premium brands typically specify double-needle topstitch with 1/16 in needle spacing. That visual consistency is part of what signals quality to retail buyers examining samples.
- Seam finish: how is each raw edge finished? Serged, bound, Hong Kong finish, felled? Specify it.
- Seam strength requirement: if you're selling into retail accounts that have their own QC requirements, ISO 13935 covers seam tensile strength testing. A minimum of 200 Newtons is a common retail requirement for seam strength in woven tops. Specify this in your tech pack and request a test report from your factory.
That last point is worth emphasising. Most small brands never specify a seam strength requirement or request a test report. Retailers who are buying hundreds or thousands of units regularly do specify it, because they've already absorbed enough returns to know what it costs. If you're trying to get into those accounts, your tech pack needs to speak their language.
How a factory's QC process catches seam defects and what slips through without proper inspection
A well-run factory QC process has multiple points where seam defects can be caught. Inline inspection happens during sewing, where a QC checker examines completed garments at each sewing station before the piece moves to the next operation. End-of-line inspection is a more comprehensive check of the finished garment, covering seam integrity, stitch consistency, and finish quality. And a pre-shipment inspection checks a statistical sample of the completed run against the approved spec.
What slips through? Primarily issues that require stress testing rather than visual inspection. A seam can look perfect and still fail at 150 Newtons of tension when your retail buyer's spec requires 200. Thread tension issues that don't manifest visually but create weak points that fail under wash agitation. Stitch density variations that are within acceptable visual tolerance but outside acceptable strength tolerance. These don't show up in a garment-by-garment visual check.
That's why specifying a seam strength test in your tech pack, and requesting documentation from your factory that they've run it, matters. A factory that's doing inline and end-of-line QC is catching visible defects. You need to verify that the construction itself meets your strength requirements, not just that it looks right on the table.
The brands that have the fewest seam-related returns are not necessarily the ones working with the best factories. They're the ones who showed up with a tech pack that told the factory exactly what they needed, and then followed up with a pre-production sample review before the bulk run was cut. The factory can only build what you've specified. If the spec is vague, the results will be inconsistent. Get specific, put it in writing, and review it on a physical sample before you commit to the run.
If you want to review your tech pack's seam specifications before your next run, or you're starting from scratch and need guidance on seam type, thread, and stitch density for your specific fabric and application, send us your brief and we'll tell you exactly what we'd recommend.
Get a quote